Last updated: 2025-09-19
SmartRecruiting - Setup
- Overview
- Accessing Setup
- Creating Position Workflow Components
- Stage Types
- Interview Types
- Action Types
- License Types
- Curriculum Types
- Creating Positions (Position Setup Wizard)
Overview
Before candidates can be tracked in SmartRecruiting, the following recruiting workflow components must be set up:
- Stage types
- Interview types
- Action types
- License types
- Curriculum types
- Positions
To set up these components, a user must have the Recruiter Setup Administrator user right enabled on the User Accounts - User Rights Content Link.
Accessing Setup
From the SmartOffice side menu, select Setup > Recruiting Setup to open the SmartRecruiting Setup dialog box.
Creating Position Workflow Components

Setup should be performed in the order indicated in the setup side menu, beginning with stage types and ending with positions. This is because positions are created by assembling various stage, action, interview, license and curriculum types.
The following diagram illustrates this relationship.

Stage Types
Stage types represent the general phases of a hiring process. For example, one stage in the process might be called "Establish Contact," while another might be called "Make Offer."
- Select Stage Types from the SmartRecruiting Setup side menu.
- Click the New 'Recruit Stage' Record button to open the Stage Type - New dialog box.
- Enter the name of the stage type and then click the OK button.
- Repeat Steps 1-3 until all necessary stage types are created.
Interview Types
Interview types represent the interviews during which candidates will be evaluated. Examples of common interview types are "First Interview" and "Final Interview."
- Select Interview Types from the SmartRecruiting Setup side menu.
- Click the New 'Interview' Record button to open the Interview Type - New dialog box.
- Enter the name of the interview type and then click the OK button.
- Repeat Steps 1-3 until all necessary interview types are created.
Action Types
Action types represent tasks (other than interviews) to be carried out during each stage of the hiring process. For example, the "Establish Contact" stage of a hiring process might include a "Request Resume" action.
- Select Action Types from the SmartRecruiting Setup side menu.
- Click the New 'Action' Record button to open the Action Type - New dialog box.
- Enter the name of the action type and then click the OK button.
- Repeat Steps 1-3 until all necessary action types are created.
Action types can be associated with one or more documents. For example, an action named "Send Rejection Letter" might contain a form rejection letter in Word format.
To add a document to a newly created action:
- Select the action from the Action Types list to open the Action Type dialog box.
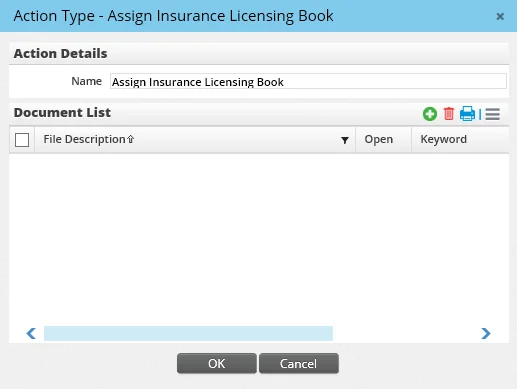
- In the Document List section, do one of the following:
- To add a document from the local computer, click the Options button
 and select New 'Documents' record button.
 - To link to a document stored on an intranet site or the Internet, click the Options button and select Link to Web address (URL) to open the Document Detail dialog box. Enter a description, URL and other information in the appropriate fields and then click the OK button.
License Types
License types represent the licenses required for a position, e.g., a life license may be required for a particular advisor position.
- Select License Types from the SmartRecruiting Setup side menu.
- Click the New 'Recruit License Preparation' Record button to open the License Type - New dialog box.
- Enter the name of the license type and then click the OK button.
- Repeat Steps 1-3 until all necessary license types are created.
Curriculum Types
Curriculum types represent curricula required for a position, such as a state ethics course or a company orientation.
- Select Curriculum Types from the SmartRecruiting Setup side menu.
- Click the New 'Curriculum' Record button to open the Curriculum Type - New dialog box.

- Enter the name of the curriculum type and then click the OK button.
- Repeat Steps 1-3 until all necessary curriculum types are created.
Creating Positions (Position Setup Wizard)
- Select Positions from the SmartRecruiting Setup side menu.
- Click the New 'Position' Record button to open the SmartRecruiting Position Setup Wizard.
- Enter the name of the position and a short description of the purpose of the position workflow.
- From the Type When Hired drop-down list, select one of the following options:
- Advisor: If the purpose of the position workflow is to recruit advisors, this option creates a workflow for the creation of a candidate who will become an advisor in SmartOffice when hired.
- Manager or Staff: If the position workflow is intended to hire candidates for a non-advisor job, these options create workflows for the creation of candidates who will become SmartOffice contacts when hired. When the candidate is hired, the contact type will change to Manager or Staff as specified.
- (Optional) To make this the default position for new candidate records, select the Default Position option.
- Click the Next button to display the Select Stages in Order step.
- Select the first stage to be used in the position from the Stages Available list and then click the right arrow button to add it to the Stages Selected list. Repeat this step until all necessary stages are selected. Note the following when selecting stages:
- A stage cannot be selected more than once in the same position.
- The selected stages are arranged in the order selected. To change a stage's position in the list, select it and then click the up or down arrow button.
- Click the Next button to open the Select Interviews and Actions for Each Stage step.
- In the Select Hired/Contracted Stage section at the bottom, select the stage that will serve as the Hired/Contracted stage. When a candidate enters this stage, the candidate's status automatically changes to Hired/Contracted. By default, this is set to the last stage listed in the Relationships section. However, any stage can be the Hired/Contracted stage.
- In the Relationships section, click a stage hyperlink to add interviews or actions to it, if needed. The Interview and Action Assignment dialog box opens for the selected stage.
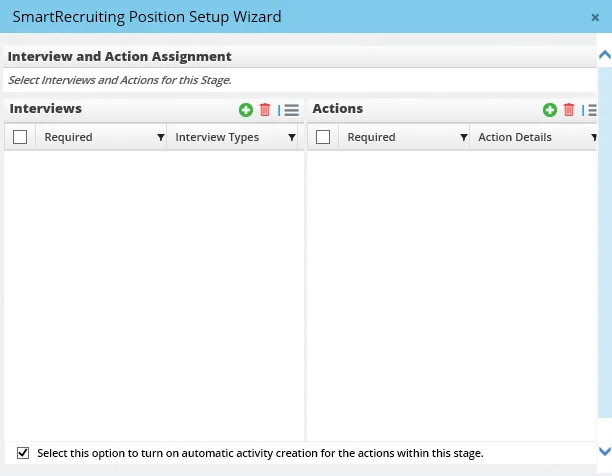
The Interview and Action Assignment dialog box consists of two lists, Interviews and Actions.
- In the Interviews and/or Actions section, click the Options button and select New 'Interview' Record or New 'Action' Record button to open the Interview Types or Action Types dialog box.
- Select an interview or action to be included in this stage by clicking its hyperlink. The newly added interview or action displays in the Interviews or Action list.
Note: An interview or action can be added only once to a stage.
- By default, interviews and actions are required (i.e., they must be completed before the stage can be completed). To make an interview or action optional, click it to open it. Then clear the Required option and click the OK button.
- (Optional) Select the check box at the bottom of the Interview and Action Assignment dialog box to enable automatic scheduling of calendar activities for all actions associated with the current stage. To learn about how interviews and actions can be linked with calendar activities, see Recruiting Process.
- Add interviews and actions to any remaining stages as needed.
- (Optional) To enter values in the Goal (Days) column for each stage, select Switch to Edit Mode from the expanded Options menu. When the Goals dialog box opens, enter the number of days in which each stage is expected to be completed. When finished, click the Save button.
- Click the Next button to open the Select License Preparation Period and Precontract Curriculum step.
This step contains two lists: License Preparation Periods and Precontract Curriculum. Any license preparation periods or curricula needed for the position should be added here.
- Click the Options button in the License Preparation Periods section or the Pre-Contract Curriculum section, and then select New 'Recruit License Preparation' Record or New 'Curriculum' Record to open the License Types or Curriculum Types dialog box.
- Select a license type or curriculum type by clicking its hyperlink. The newly added license or curriculum displays in the License Preparation Periods or Precontract Curriculum list.
- Click the Save & Close button to end the position creation process, or click the Save & New button to create another position.