Last updated: 2025-09-19
Sets - Creating a Set
Overview
This topic covers the steps for creating a SmartOffice set. You can create a basic set (the most common type) or an advanced set.
Basic Set
Video not available: Creating a Basic (Ad Hoc) Set In a basic or
- Do one of the following:
- From the side menu, select People & Companies > Sets. When the Search Sets dialog box opens, select the New button. - From the Set List, select Menu > New 'Set' record.
- In the Select Set Type dialog box, choose the record type that you plan to add to the set.
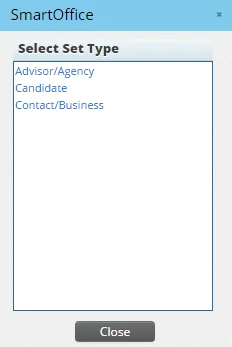
Note: SmartWholesaler users will see a Distributor type in this dialog box instead of Advisor/Agency.
- In the New Set dialog box, enter a name and description for the set.
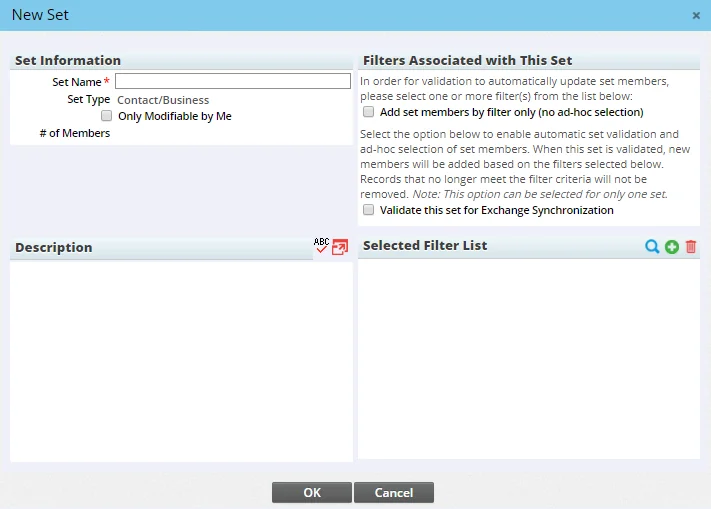
- (Optional) To prevent other users in the office from modifying the set, select the Only Modifiable by Me option. Note that a user who has the Administrator: User Rights & Creation/Licenses/Groups user right can modify or delete the set regardless of whether you select this option.
- If this is a contact set that you plan to use with Microsoft Exchange sync, select the Validate this set for Exchange Synchronization option. Note:
- You can select this option for only one set.
- After the set is created, this option can be modified only by the user who created the set.
- Select the OK button.
- Add members to the set:
- When the new set appears, select the Set Members content link.
- Select Menu > New 'Set Member' record to open the search dialog box.
- Enter your search criteria and select the Search button.
- In the list of search results, select one or more records, and then select the OK button.
The set is now ready for use. To learn how to update the set's members later, see Adding and Deleting Set Members.
Advanced Set
In an advanced sets, one or more filters are used to determine membership in the set. There are two types of advanced sets:
- Filtered: In a filtered set, membership is determined entirely by filters. Members can not be added or removed manually. Membership can change only if newly created SmartOffice records match the filter criteria, or if existing records no longer match the filter criteria.
- Combination: This type of set combines the features of a basic (ad-hoc) set and a filtered set. Its contains members that are added manually as well as members that are added based on filters.
Video not available: Creating a Basic (Ad Hoc) Set In a basic or
Video not available: Creating a Basic (Ad Hoc) Set In a basic or
- Do one of the following:
- From the side menu, select People & Companies > Sets. When the Search Sets dialog box opens, select the New button. - From the Set List, select Menu > New 'Set' record.
- In the Select Set type dialog box, choose the record type that you plan to add to the set.
Note: SmartWholesaler users will see a Distributor type in this dialog box instead of Advisor/Agency.
- In the New Set dialog box, enter a name and description for the set.
- (Optional) To prevent other users in the office from modifying the set, select the Only Modifiable by Me option. Note that a user who has the Administrator: User Rights & Creation/Licenses/Groups user right can modify or delete the set regardless of whether you select this option.
- If you are creating a filtered set, select the Add set members by filter only (no ad-hoc selection) option. Clear this option if you are creating a combination set.
- If this is a contact set that you plan to use with Microsoft Exchange sync, select the Validate this set for Exchange Synchronization option. Note:
- This option is not recommended for use with filtered sets, because when the set is later validated and then synchronized, any contacts that no longer meet the filter criteria will be removed from Exchange. To use a set containing filters for Exchange sync, create a combination set instead.
- You can select this option for only one set.
- After the set is created, this option can be modified only by the user who created the set.
- This option affects the way the set is validated. For more information, see Validating a Set.
- In the Selected Filter List, add your filters:
- To select an existing filter, select the Search button
 to open the Search Filters dialog box. Then search for and select the filter.
 - To create a filter, select the New 'Filter' record button
 . Then enter the filter criteria (for help, see Creating and Deleting Filters).
- Select the OK button.
- If you are creating a combination set, add members to the set:
- When the new set appears, select the Set Members content link.
- Select Menu > New 'Set Member' record to open the search dialog box.
- Enter your search criteria and select the Search button.
- In the list of search results, select one or more records, and then select the OK button.
The set is now ready for use. Tip: Advanced sets should be validated before use to ensure that their membership is up to date.