Last updated: 2025-09-19
SmartEvents - Setup
- Overview
- User Setup
- Module Setup
- Accessing Event Setup
- Creating and Deleting Event Venues
- Creating and Deleting Event Tasks
- Creating and Deleting Event Templates
Overview

Before a user can create events using the SmartEvents module, the user must be assigned the appropriate licenses in SmartOffice. In addition, SmartEvents must be set up with the appropriate venues, tasks and event templates.
User Setup
A SmartEvents user must have the following licenses enabled on the User Accounts - User Rights content link (under Setup > User Accounts). These licenses can be enabled by a SmartOffice administrator.
- Event Management Administrator: This license is required to perform SmartEvents module setup. It is not necessary for creating and managing events.
- Event Management User: This is the basic license required for creating and managing events.
Module Setup
Before users in the office can create events, a user with the Event Management Administrator license must create the necessary venue, task and template records in Event Setup.
Accessing Event Setup
From the SmartOffice side menu, select Setup > Event Setup to open the Event Setup dialog box.
Creating and Deleting Event Venues
Create a venue record for each venue the organization uses for events.
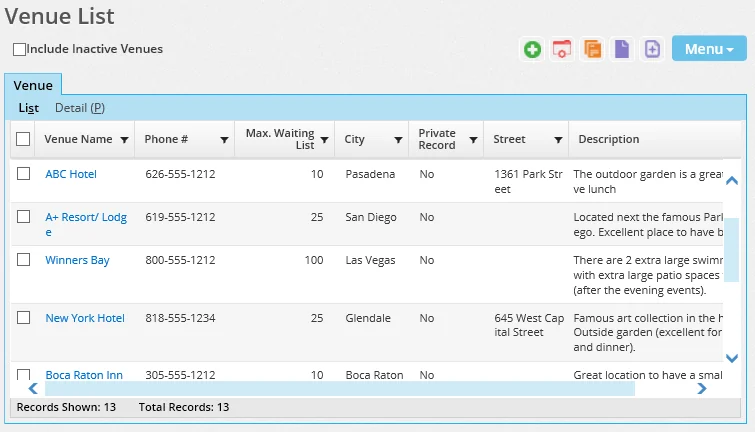
- In Event Setup, click Venues in the left menu to display the Venue List.
- Select Menu > New 'Venue' record to display the Venue Detail content link.
- Enter the venue information. Note the following:
- The Venue Name and Max. Capacity fields are required.
- To add venue contacts, click the Options button
 and select New 'Venue Contact' record in the Venue Contacts section. When the Venue Contacts dialog box opens, click the Contact Name hyperlink to search for an existing contact record or to create a new one. For more information about searching for and creating contacts, see Contacts and Businesses.
- Select Menu > Save.
To view and/or edit a venue after creating it, click its first-column hyperlink (by default, the venue name) in the Venue List. To delete a venue, tag it in the Venue List and then select Menu > Delete 'Venue' record.
Creating and Deleting Event Tasks
Events tasks are activities that users in the office are assigned to complete before, during and after events. These tasks might include mailing invitations, hiring caterers, sending follow-up correspondence, and so on.
- In Event Setup, click Tasks in the left menu to display the Task List.
- Select Menu > New 'Tasks' record to open the New Task dialog box.
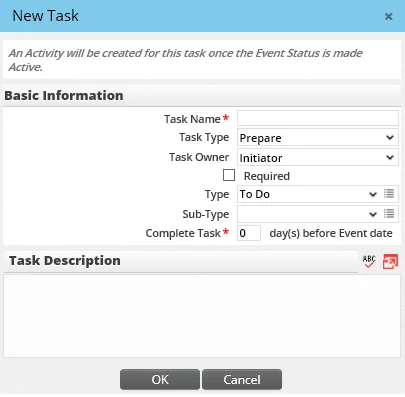
- Enter a name for the task (e.g., Mail Invitations). This field is required.
- From the Task Type drop-down list, select one of the following options:
- Prepare: Select this option for pre-event activities. - Conduct: Select this task type for activities that must be completed while an event is being conducted. - Follow-up: Select this task type for post-event activities.
- From the Task Owner drop-down list, select the default user who will be assigned to this task:
- Initiator: This option assigns the task to the SmartOffice user listed as the initiator on an event's Detail content link.
- Coordinator: This option assigns the task to the SmartOffice user listed as the coordinator on an event's Detail content link. - Specific User: Selecting this option displays the Responsible User field. Click the Responsible User hyperlink to assign a user other than the event initiator or coordinator to the task.
- Select the Required option if the task must be completed. If the task is not mandatory, clear this option.
- Use the Type and Sub-Type drop-down lists to specify the type (To Do, by default) and sub-type (optional) of the calendar activity that will be created when the event becomes active. For more information about activity types and sub-types, see SmartCalendar - About Activities.
- In the Complete Task field, enter the number of days before or after the event that the task must be completed, depending on whether the task is a Prepare or Follow-up task. This field is required for those task types.
- Click the OK button.
To view and/or edit an event task after creating it, click its first-column hyperlink (by default, the task name) in the Task List. To delete a task, tag it in the Task List and then select Menu > Delete 'Tasks' record.
Creating and Deleting Event Templates
Event templates store settings for events that an organization conducts.
Templates must exist before events can be created (this is true for both one-time and recurring events). When a user creates an event, much of the necessary event information is pre-filled from its template, making event creation quick and easy. However, much of this pre-filled information can be modified at the event level.
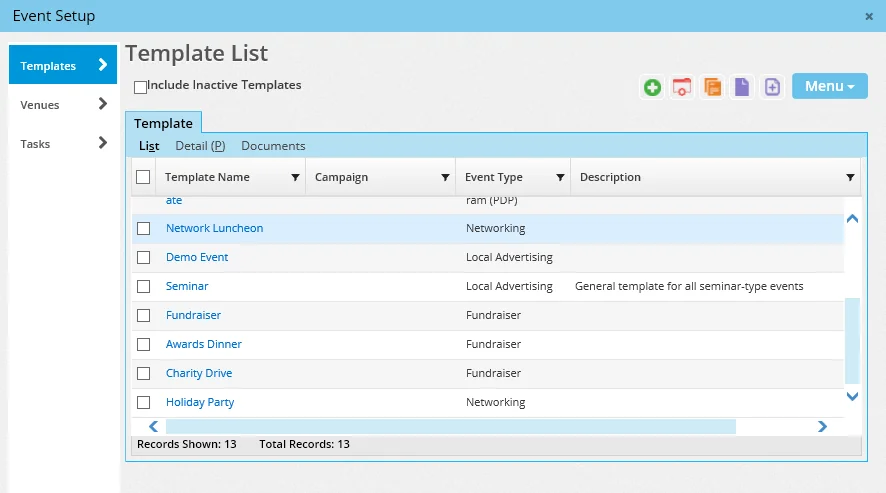
- In Event Setup, click Templates in the left menu to display the Template List.
- Select Menu > New 'Template' record to display the new template Detail content link.
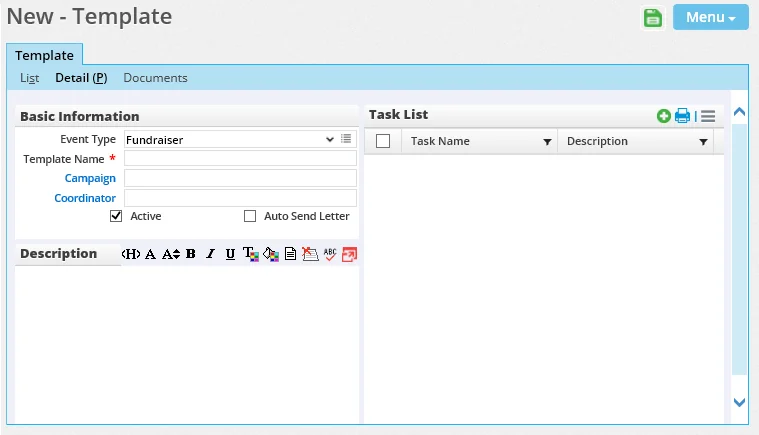
- From the Event Type drop-down list, select the type that best describes the event. SmartOffice includes several predefined event types; users with the Drop-down Choice Customization user right can create their own types using the Customize Choice
 button (see Customizing Drop-Down Lists).
 - In the Template Name field, enter a descriptive name that will display in the Template List and other areas of the SmartEvents module. This field is required.
- If the event is tied to a marketing campaign, click the Campaign hyperlink to search for and select the campaign. For more information, see SmartCampaigns.
- Click the Coordinator hyperlink to select the SmartOffice user who will serve as the event coordinator. The coordinator can view unfinished event activities for all SmartOffice users involved in the event.
- Select the Active option to make the new template available for use once it is saved. Clearing this option makes the template inactive. Inactive templates remain in the system but cannot be used to create events.
- Select the Auto Send Letter option to have SmartOffice automatically create and send correspondence to event invitees when their statuses change (for more information about invitee status, see Invitees, Registered and Attendees Content Link). If this option is cleared, SmartOffice asks before sending such correspondence.
- In the Description field, enter any comments that might help other users determine whether this template is appropriate for the events they want to create.
- Select Menu > Save to save the template and display the Auto Send Letter List section.
- In the Task List, enter any event tasks that should be included in all events based on this template:
- Click the Options button and select New Template Task Record to open the Task Detail dialog box. 2. If the task has not been created in Event Setup yet, enter the task details (see Creating and Deleting Event Tasks) and then click the OK button. If the task already exists, click the Existing Task Search button
 to search for the task.
 - In the Auto Send Letter List, add any correspondence templates that SmartOffice should use to generate correspondence when an invitee's status changes:
- Click the Options button and select New 'Auto Send Letter' record to open the Auto Send Letter Detail dialog box.
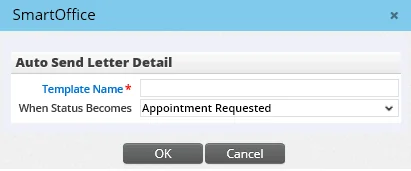
2. Click the Template Name hyperlink to search for and select a letter template. 3. From the When Status Becomes drop-down list, select the invitee status that will trigger the correspondence workflow. 4. Click the OK button.
- When the template is finished, select Menu > Save.
To view and/or edit an event template after creating it, click its first-column hyperlink (by default, the template name) in the Template List. To delete an event template, tag it in the Template List and then select Menu > Delete 'Template' record.