Last updated: 2025-09-19
User Accounts - User Rights Templates
- Overview
- Creating User Rights Templates
- From Scratch
- Copying an Existing Template
- Deleting User Rights Templates
- Viewing User Rights Templates
- Applying a User Rights Template to a User Account
- New User Accounts
- Existing User Accounts
Overview
User rights templates allow SmartOffice administrators to quickly assign a pre-configured collection of user rights to one or more user accounts. These templates eliminate the need to assign user rights individually and help organizations standardize the user rights they assign to user accounts.
An administrator typically assigns a user rights template when creating a user account, but templates can assigned to existing user accounts as well.
Note: Only users with the Administrator: User Rights & Creation/Licenses/Groups or Administrator: User Rights/Groups user right can manage user rights templates. See User Accounts - User Rights.
Creating User Rights Templates
When creating a user rights template, the administrator defines a template name and specifies which user rights are enabled or disabled. User rights templates can be created from scratch or by copying an existing template.
From Scratch
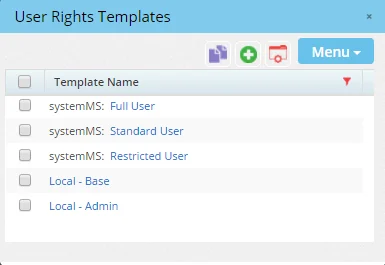
- Select User Rights Templates from the expanded Setup menu to open the User Rights Templates dialog box.
- Select Menu > New 'Role Template' record to display the next User Rights Templates dialog box.
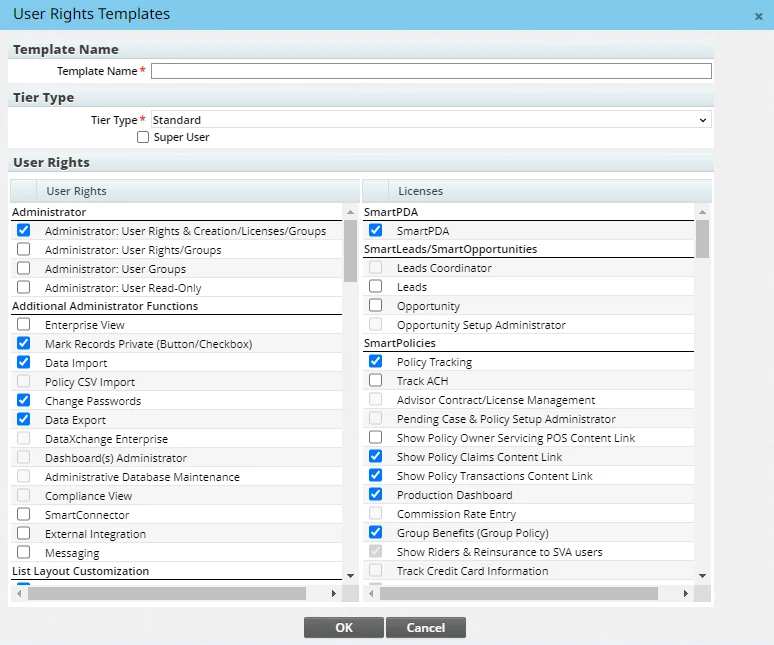
- Enter the template name.
- From the Tier Type drop-down list, select the licensing tier that the new template applies to (see Office Settings - Tier Licenses). The tier selected determines the user rights and licenses available for selection; unavailable user rights are dimmed.
- Under the Tier Type drop-down list, select the Super User option to give the users the ability to view all data in the office except for privatized data, regardless of user assignment (for more information, see Office Security - Super Users_-_super_users.htm)).
- Select the appropriate user rights.
- Click the OK button.
Copying an Existing Template
User rights templates can be copied to quickly create additional templates based on an existing template.
- Click Setup from the side menu and select User Rights Templates.
- In the User Rights Templates dialog box, tag the template to be copied.
- Select Menu > Copy User Rights Template.
- In the Template Name field, enter a name for the new template.
- Make any changes to the selected user rights.
- Click the OK button.
Deleting User Rights Templates
Note: Only users with the Administrator: User Rights & Creation/Licenses/Groups user right can delete user rights templates. See User Accounts - User Rights.
- Select User Rights Templates from the expanded Setup menu to open the User Rights Templates dialog box.
- Select one or more templates.
- Select Menu > Delete 'RoleTemplate' Record.
Viewing User Rights Templates
- Select User Rights Templates from the expanded Setup menu to open the User Rights Templates dialog box.
The dialog box displays templates from the local office, parent offices and System office.
- Click the name of a template to view the user rights selected in that template.
Applying a User Rights Template to a User Account
User rights templates can be applied to both new and existing user accounts.
New User Accounts
Existing User Accounts
- Search for the user account or accounts.
- In the User List, tag one or more user accounts.
- Select Menu > Apply User Rights Template.
- When the confirmation message displays, click the Yes button to open the User Rights Templates dialog box.
- Click the name of a template. The template is instantly applied to the selected user accounts.