Last updated: 2025-09-19
SmartOpportunities - Opportunity Setup
- Overview
- Accessing Opportunity Setup
- Managing Processes
- Creating a Process
- Deleting a Process
- Modifying an Existing Process
- Copying an Existing Process
- Exporting a Process
- Importing a Process
- Managing Opportunity Stages
- Managing Stage Action Definitions
- Creating an Opportunity User Role
- Linking an Action to a User Role
- Linking a Stage to Activity Outcome
- Linking a Stage to a Pending Case/Policy Status
Overview
Before a SmartOpportunities user can create opportunities, an opportunity setup administrator must configure the following parameters in Opportunity Setup:
- Create sales processes.
- Create opportunity stages (sales cycles).
- Create stage action definitions (if applicable).
- Create opportunity user roles (if applicable).
- Create user role maps (if applicable).
- Map opportunity stages to specific activity outcomes (if applicable).
- Identify all responsible users (if applicable).
- Link stages to pending case/policy statuses (if applicable).
Note: Before performing setup, review the information in Opportunity Structure to become familiar with the terminology and basic concepts underlying SmartOpportunities.
Accessing Opportunity Setup
Select Opportunity Setup from the expanded Setup menu to open the Opportunity Setup dialog box.
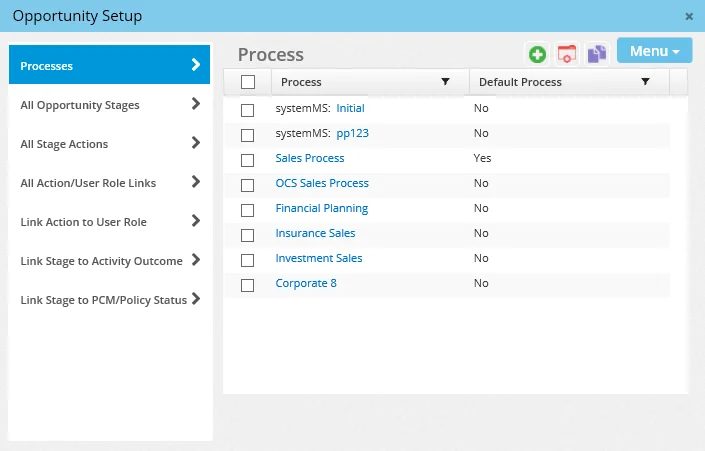
The following sections describe how to configure Opportunity Setup.
Managing Processes
Creating a Process

- From the Opportunity Setup dialog box, select Processes.
- Select Menu > New 'Process' record to open the Process dialog box.
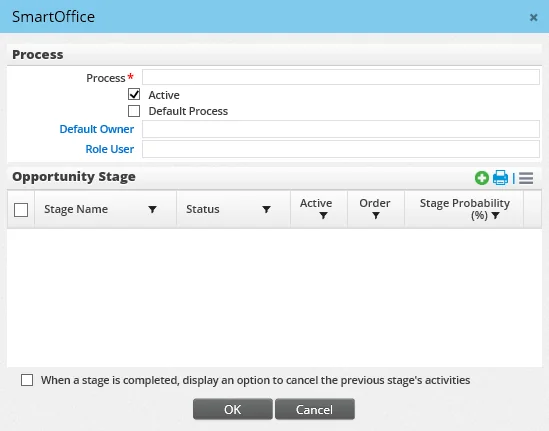
- Enter a descriptive name for the process in the Process field.
- Click the Default Owner hyperlink to select the opportunity owner. A dialog box listing users with the Producer/Manager user type opens. If Default Owner is not selected then the role user is designated as the opportunity owner.
- To make this process the one that is preselected by default when users in the office create opportunities, select the Default Process option. (If the user has selected a different default process in User Preferences - Basic Info, that setting takes precedence over this office-level setting.)
- Add a stage to the process by selecting Menu > New 'Opportunity Stage' record in the Opportunity Stage section to open the Opportunity Stage dialog box.
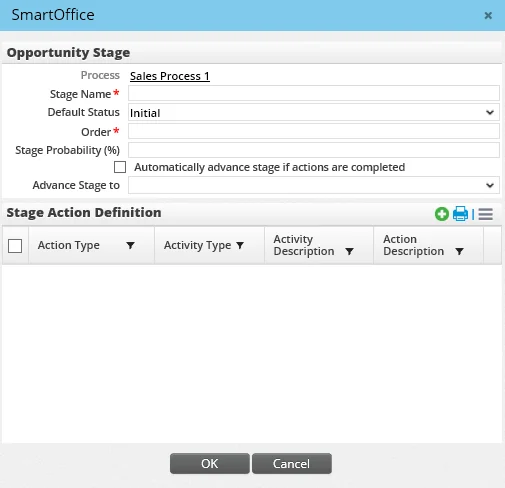
- Complete the fields to define the opportunity stage:
- Process: The Process name is automatically entered.
- Stage Name: Enter the name of the stage (e.g., Warm Prospect, Needs Analysis, Proposal, etc.) This is a mandatory field. - Default Status: Select the Default Status of this opportunity stage from the drop-down list. - Order: Enter a number indicating the stage's position in the sales cycle order. This is a mandatory field. - Stage Probability (%): Enter the probability of the sale being made. If the user leaves the Stage Probability field blank—or if the previous default value is not changed on the Opportunity Detail content link—the new stage probability will populate after the opportunity is saved. - Automatically advance stage if actions are completed: This option enables the Advance Stage To field. The user can select any stage from the drop-down list to designate the stage that the opportunity should move to once the current stage's actions are completed.
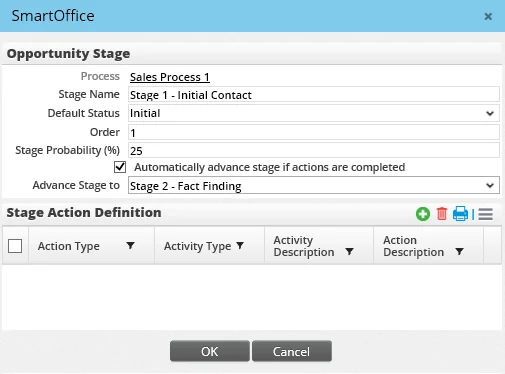
- In the Stage Action Definition section, add an action to the stage by clicking the Options button
 and selecting New 'Stage Action Definition' record to open the Stage Action Definition dialog box.
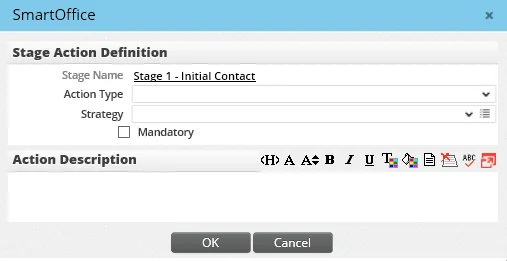
Note that actions added to a stage in Opportunity Setup after an existing opportunity has already moved to that stage do not apply to the existing opportunity.
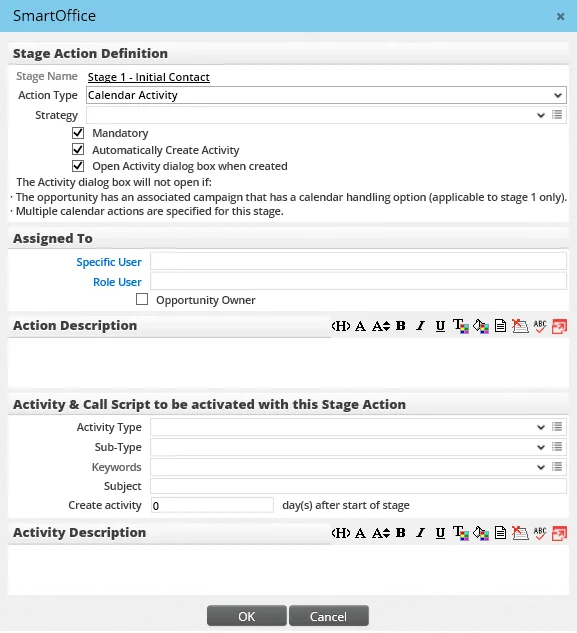
This dialog box is dynamic and changes based on the option selected from the Action Type menu. Action Type: Calendar Activity
Stage Action Field Descriptions
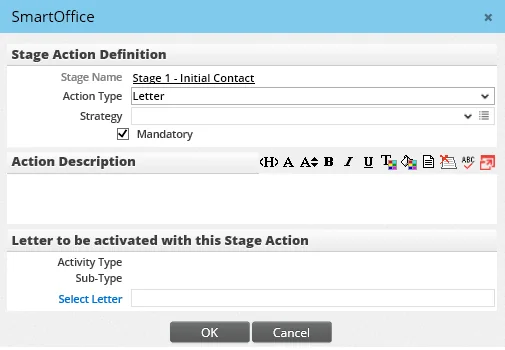
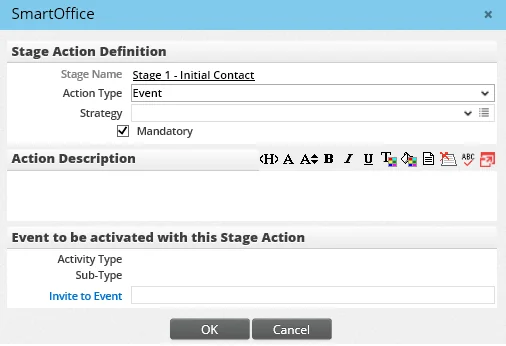
- - Stage Name: The Stage Name displays automatically. - Action Type: Action Types are actions associated with the respective stage. These display when the user selects the stage or strategy. Select an Action Type from the drop-down list. - - Calendar Activity - Letter - Event (this option displays only if the user has the SmartEvents module) 2. - Strategy: This drop-down list can be used to associate an action with a strategy. Strategies enable the user to quickly change the stage actions associated with an opportunity. When the user changes the opportunity's strategy, the stage actions change to match the new strategy. An opportunity's strategy is defined in the Sales Strategy section of the opportunity's Related Resources/Competition content link. - - (Blank) - Defend - Develop - Flanking - Fragment - Frontal - Mandatory: Select this option if the action is mandatory; however, note that a user can still move to another stage without completing mandatory actions. - Automatically Create Activity (Calendar Activity actions only): Select this option to assign the activity to a specific user, role user or opportunity owner. The specific user and role user are hyperlinks and are mapped from the All Action/User Role Links and Link Action to User Role fields in Opportunity Setup (see Creating an Opportunity User Role and Linking an Action to a User Role for additional information.) If the user selects the Opportunity Owner option from the Assigned To section, the activity will be assigned to the opportunity owner. - - Open Activity dialog box when created: This option is available only if the Automatically Create Activity option is selected. Selecting this option opens the Activity dialog box when the opportunity stage is changed. This feature gives the user the ability to change the activity's details. If the user clicks the Cancel button on the Activity dialog box, the activity is created for the current date.
If a stage has two Calendar Activity actions and only one action has the Automatically Create Activity option selected, the Activity Detail dialog opens when the stage is changed.
The Activity Detail dialog does not display if: - - The opportunity has an associated campaign that has a calendar handling option (applicable to the first stage only).
- Multiple Calendar Activity actions specified for this stage have this option selected. - Create activity \_\_\_\_ day(s) after start of stage: To schedule the activity so that it begins one or more days after the stage changes, enter the number of days in this field.
- Enter the appropriate information in the Stage Action Definition dialog box and then click the OK button. The Opportunity Stage displays with the newly created action.
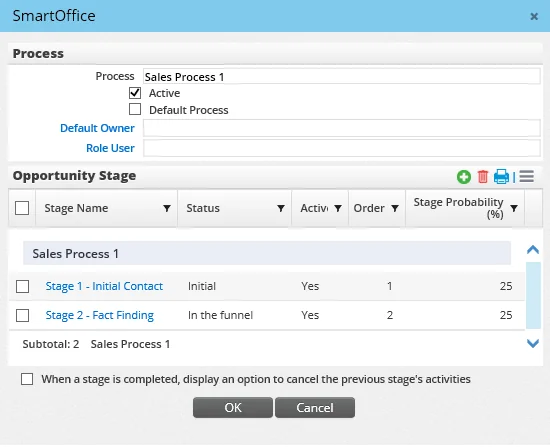
- (Optional) Select the When a stage is completed, display an option to cancel the previous stage's activities option to enable the user to cancel any activities related to the opportunity that were created during the previous stage.
- Click the OK button in the Opportunity Stage dialog box.
- Click the OK button again to return to the Opportunity Setup dialog box.
- The newly created process is saved and displays in the Process list.
Deleting a Process
Note: A process cannot be deleted if an opportunity based on the process is linked to a contact.
- From the Opportunity Setup dialog box, select Processes.
- Tag the process to be deleted.
- Select Menu > Delete 'Process' record.
Modifying an Existing Process
- From the Opportunity Setup dialog box, select Processes.
- Click the first-column hyperlink of the process to be modified (by default, this is the processes name).
- When the Process dialog box opens, make changes to the process, stages and/or stage actions.
- Click the OK button.
Copying an Existing Process
To create a process that is similar to an existing process, the user can create a copy of that process and then modify the copy as needed.
- From the Opportunity Setup dialog box, select Processes.
- Select the process to be copied.
- Select Menu > Copy to open the Process dialog box.
- Enter a name for the new process.
- Click the OK button.
Exporting a Process
A sales process can be exported to an XML file and shared with users in other SmartOffice offices. The exported file contains information about the process, its stages, the stage order and all stage actions.
- From the Opportunity Setup dialog box, select Processes.
- Select the process to be exported.
- Select Menu > Export - Process. Internet Explorer prompts the user to either open or save the file.
- Click the Save button and select a location on the local computer to save the file.
Importing a Process
A sales process that has been exported to an XML file can be imported as follows:
- From the Opportunity Setup dialog box, select Processes.
- Select Menu > Import - Process to open the Import - Process dialog box.
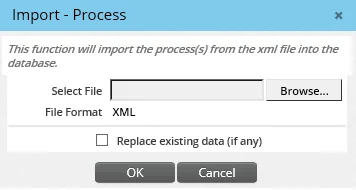
- Click the Browse button to locate and select the import file on the local computer.
- (Optional) Select the Replace existing data (if any) option to overwrite any existing process with the same name.
- Click the OK button.
Managing Opportunity Stages
From the Opportunity Setup dialog box, select All Opportunity Stages to open the Opportunity Stage list.
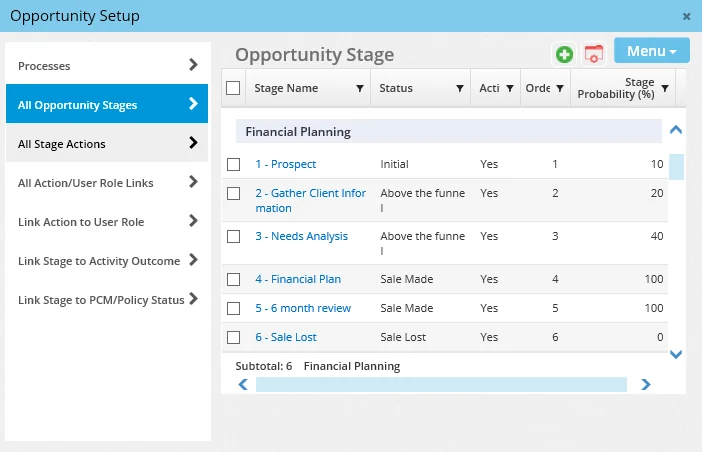
The list provides an overview of all stages that have been created. From here, the user can perform these tasks:
- Create a stage by selecting Menu > New 'Opportunity Stage' record and selecting the appropriate process (note that processes created at the System office level are not available for selection). See Creating a Process for more information about stage creation.
- Delete a stage by selecting it and then selecting Menu > Delete 'Opportunity Stage' record.
- View and/or modify a stage by clicking its name and making any necessary changes.
Managing Stage Action Definitions
From the Opportunity Setup dialog box, select All Stage Actions to open the Stage Action Definition list.
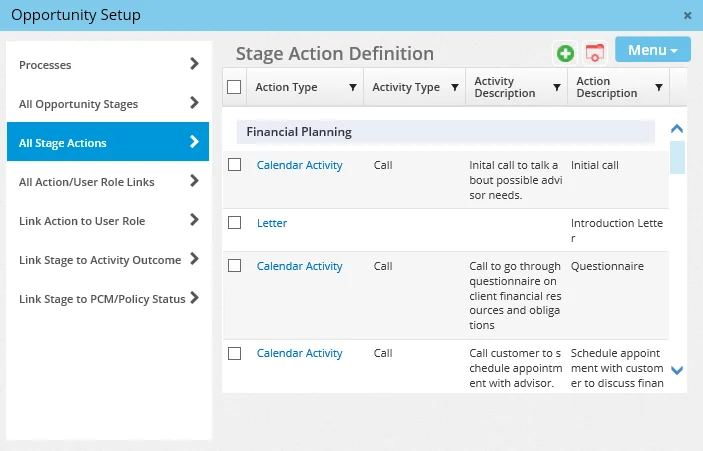
The list provides an overview of all stage actions that have been created. From here, the user can perform these tasks:
- Create an action by selecting Menu > New 'Stage Action Definition' record and selecting the appropriate stage (note that stages created at the System office level are not available for selection). See Creating a Process for more information about stage action creation.
- Delete an action by selecting it and then selecting Menu > Delete 'Stage Action Definition' record.
- View and/or modify an action by clicking its name and making any necessary changes.
Creating an Opportunity User Role
After the stages are defined for a process, opportunity user roles can be created.
Although they are optional, user roles can be useful when a team of users processes stage actions. For example, if an action calls for preparing marketing brochure mailers, several people in the organization might be able to perform this action. Therefore, instead of being assigned to a single user, the action can be assigned to a user role, or team.
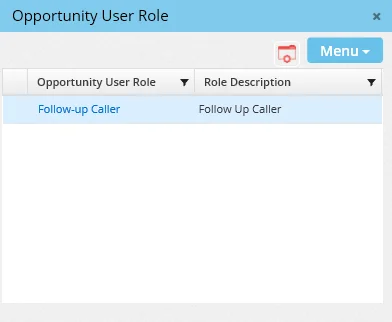
- From the Opportunity Setup dialog box, select All Action/User Role Links to open the Opportunity User Role list.
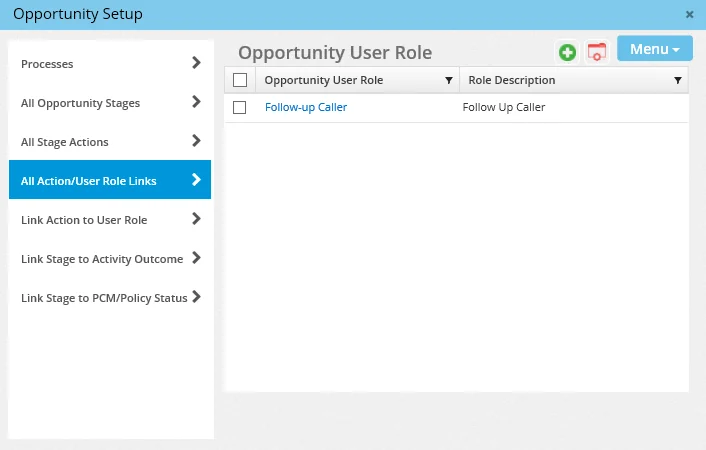
- Select Menu > New 'Opportunity User Role' Record to open the Opportunity User Role dialog box.
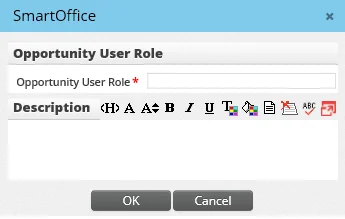
- Enter the opportunity user role's name and description, and then click the OK button to display the newly created opportunity user role on the corresponding list.
Linking an Action to a User Role
After user roles are created, one or more users in the office can be assigned (or "mapped") to each role. These "role users" are automatically added as participants to activities created by Calendar Activity-type actions.
- From the Opportunity Setup dialog box, select Link Action to User Role to open the Opportunity User Role Map list.
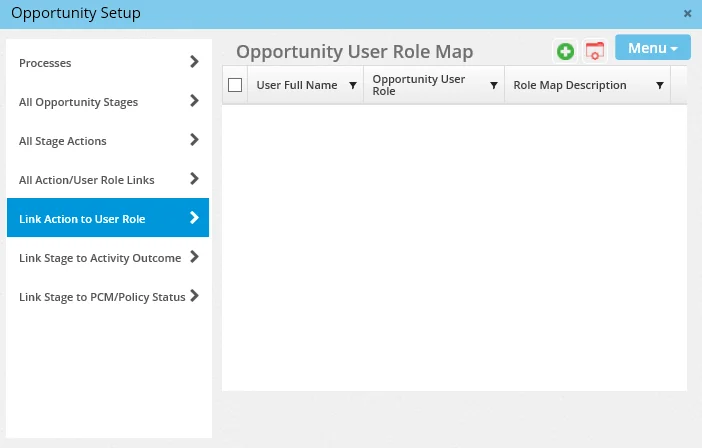
- Select Menu > New 'Opportunity User Role Map' Record to open the Opportunity User Role dialog box.
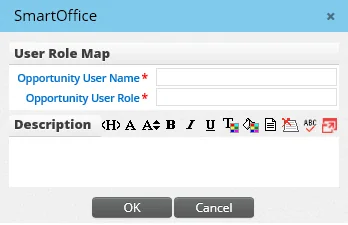
- Click the Opportunity User Name hyperlink to open the Available Users dialog box.
- Click the appropriate user hyperlink to display that user name in the Opportunity User Name field.
- Click the Opportunity User Role hyperlink to open the Opportunity User Role dialog box.
- Click the appropriate opportunity user role name to display that user role in the Opportunity User Role field.
- Click the OK button to add the new user role map to the list.
Linking a Stage to Activity Outcome
Linking a stage to an activity outcome automates the process of promoting an opportunity through its stages. When an activity linked to an opportunity is marked Done and the user selects an activity outcome linked to a stage, the opportunity is automatically moved to the specified stage. For more information, see Updating the Status of an Opportunity.
- From the Opportunity Setup dialog box, select Link Stage to Activity Outcome to open the Opportunity Stage Map list.
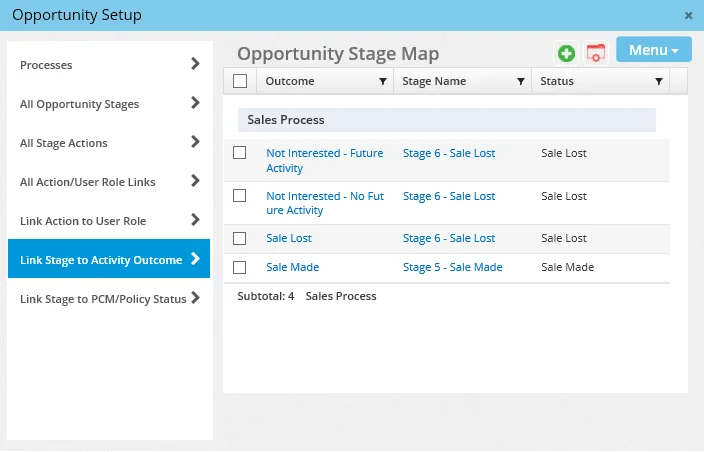
- Select Menu > New 'Opportunity Stage Map' Record to open the Opportunity Stage Map Detail dialog box.
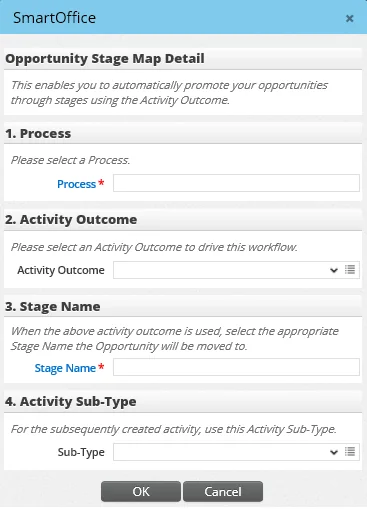
- Click the Process hyperlink to list all available Processes.
- Select the appropriate process hyperlink to return to the Opportunity Stage Map Detail dialog box.
- From the Activity Outcome field, select the appropriate outcome from the drop-down list.
- Click the Stage Name hyperlink to display a list of stages.
- Select the appropriate stage name to return to the Opportunity Stage Map Detail dialog box.
- If the activity outcome results in a new activity being scheduled, specify a sub-type for the new activity using the Sub-Type drop down list.
- Click the OK button to display the newly created opportunity stage map.
Linking a Stage to a Pending Case/Policy Status
SmartOffice can be configured to automatically change an opportunity's stage when the status of a policy or pending case linked to that opportunity is changed.
- From the Opportunity Setup dialog box, select Link Stage to Activity Outcome to open the Opportunity Stage Map list.
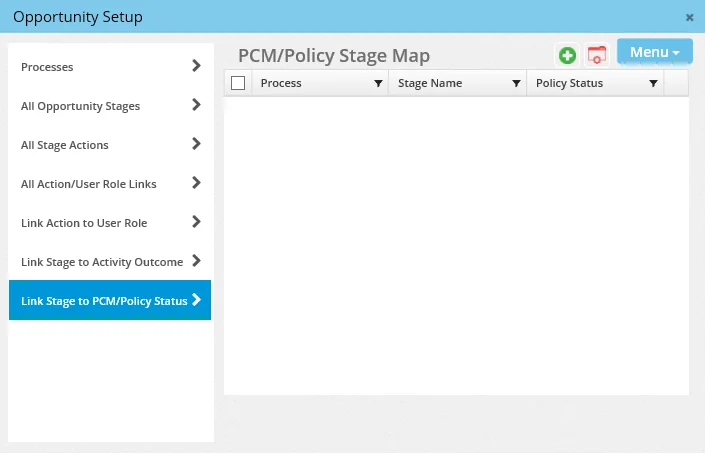
- Select Menu > New 'Opportunity Stage Map' Record to open the Opportunity Stage Map Detail dialog box.
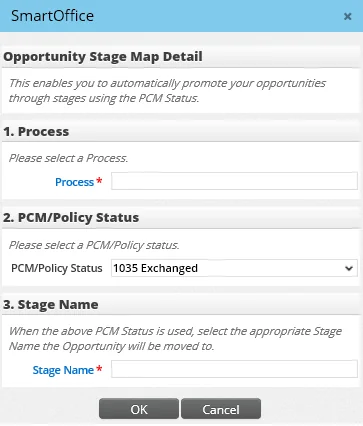
- Click the Process hyperlink to open the Process dialog box.
- Select the appropriate Process to return to the Opportunity Stage Map Detail dialog box.
- Select a pending case/policy status from the PCM/Policy Status drop-down list.
- Click the Stage Name hyperlink to display the Opportunity Stage list.
- Click the appropriate stage name hyperlink to return to the Opportunity Stage Map Detail dialog box.
- Click the OK button to save the newly created PCM/policy stage map.